Step 3: Configuring the Typemock Isolator Template
To set TFS to use the Typemock template:
1. In Team Explorer, right click select your build definition.
2. Select Edit Build Definition.
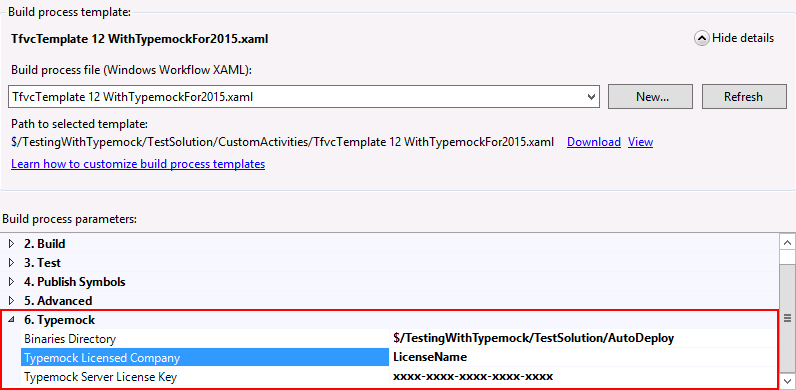
3. Click the Process tab.
4. In Build Process Template, click Show Details.
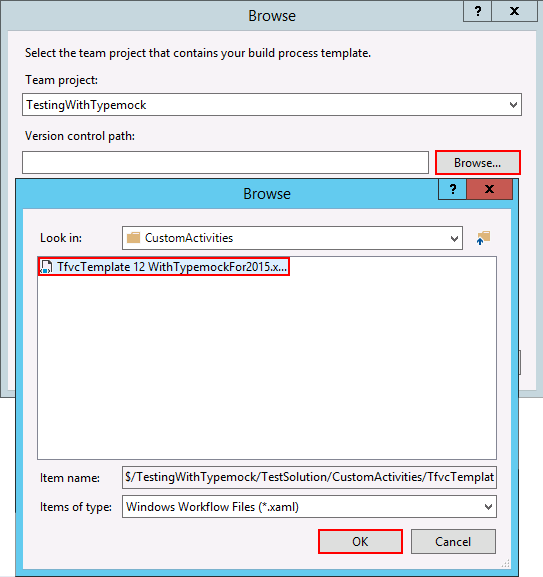
5. Click New...

6. Click Browse. The team project is shown as default
7. Click Browse.
8. Navigate to the CustomActivities folder.

9. Select TfvcTemplate 12 WithTypemockFor2015.xaml
10. Click OK.
Configuring the Typemock Isolator template
1. In Team Explorer, right click on your build definition.
2. Select Edit Build Definition.
The Edit Build definition window is displayed.
3. Select Process.
4. Scroll down to the bottom of the Build process parameters list to the Typemock Isolator properties.
5. Fill in your license details.
6. If you don't want to deploy Isolator automatically on the build agent, leave the AutoDeploy Path field empty.
 If you don't use AutoDeploy, you need Typemock Isolator installed on the build agent.

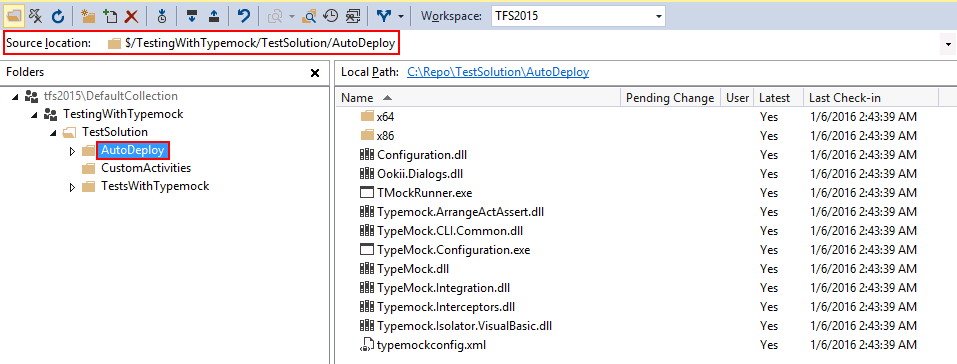
To Deploy Isolator automatically on the build agent:
1. Find the AutoDeploy folder's Source Location in Source Control Explorer.

2. Copy the value of the Source location.
3. In the Build process template, set the AutoDeploy Path field to the source control path to the Typemock AutoDeploy directory.
 Make sure that AutoDeploy directory is mapped to the source control to prevent build errors.